Tag: Networking
Wireshark Capturing methods
There are different ways you can capture Network traffic using Wireshark.
1) Locally on host interface
2) Wire Tapping
3) Port Mirroring or SPAN
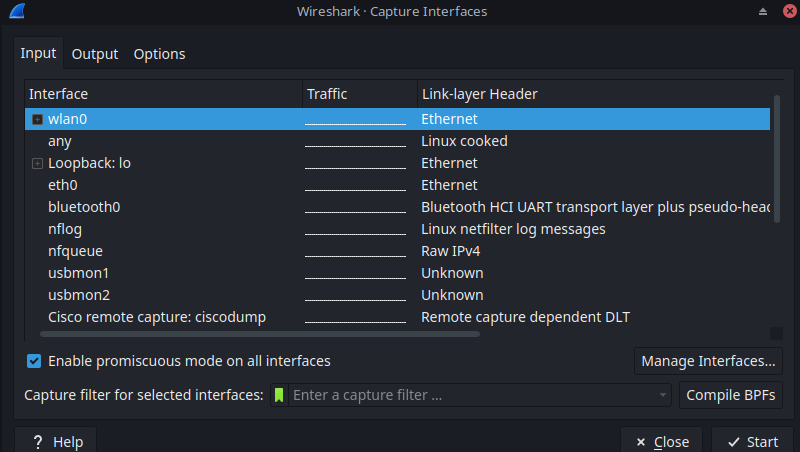
1) Simplest way of capturing traffic from local traffic (your own computer).
Just select the interface that you want to monitor and hit RUN. Nothing is simpler.
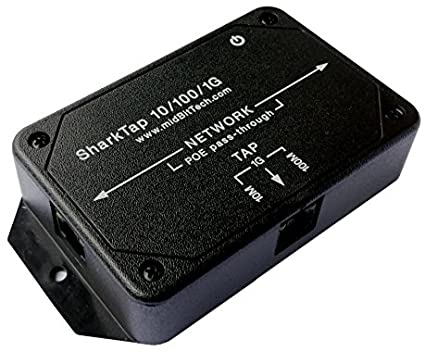
2) Wire Tapping
Another sneaky way of capturing the traffic is to tap the wire.
Instead of Network devices connected directly to each other, simply put a device in between.
Devices like below will do the job. Connect to this device with your wireshark computer and start capturing.
3) Port Mirroring
Switchport analyzer or SPAN is feature on Cisco switches where you can forward the captured packets from one interface to another for monitoring and analyzing.
Its simple to set up, on the device you want to set up span, configure as per below. in below config, fa0/1 will be the interface we want to capture and the packets will be forwarded to fa0/24. A Wireshark PC will be connected to fa0/24.
#config t
#monitor session 1 source int fa0/1 both
#monitor session 1 destination int fa0/24
#do show monitor
If you want to read more about SPAN, below is a link from Cisco on it.
https://www.cisco.com/assets/sol/sb/Switches_Emulators_v2_3_5_xx/help/250/index.html#page/tesla_250_olh/span_overview.html
The SPAN feature, which is sometimes called port mirroring or port monitoring, selects network traffic for analysis by a network analyzer. The network analyzer can be a Cisco SwitchProbe device or other Remote Monitoring (RMON) probes. Port mirroring is used on a network device to send a copy of network packets, seen on a single device port, multiple device ports, or an entire VLAN, to a network monitoring connection on another port on the device. This is commonly used when monitoring of network traffic, such as for an intrusion-detection system, is required. A network analyzer, connected to the monitoring port, processes the data packets. The device can mirror up to four interfaces per session.A packet, which is received on a network port and assigned to a VLAN that is subject to mirroring, is mirrored to the analyzer port even if the packet was eventually trapped or discarded. Packets sent by the device are mirrored when Transmit (Tx) mirroring is activated.Mirroring does not guarantee that all traffic from the source port(s) is received on the analyzer (destination) port. If more data is sent to the analyzer port than it can support, some data might be lost.
Changing Huawei ONT HS8545M5 password with MD5 and SHA256 hashes
Its always good to change the default password of your Network Devices.
Below is the instruction on how to change the default password for your Huawei ONT.
It works for Huawei ONT model H545M5 but I am sure it works the same of other Huawei ONTs as well.
- First of all, from your browser, you need to go to router’s IP. The default should be 192.168.100.1
If that doesnt work, do the IP scan first. - Then you need to know the default username and password. Default for HS8545M5 is
Account : telecomadmin
Password : admintelecom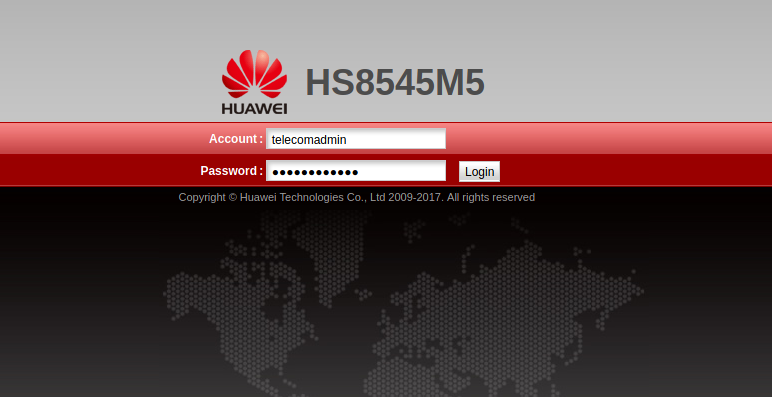
- Once logged in, navigate to System Tools > Configuration File
Download the configuration file
You will download hw_ctree.xml file
** Before making any changes, its a good idea to save the back up of your configuration file. ***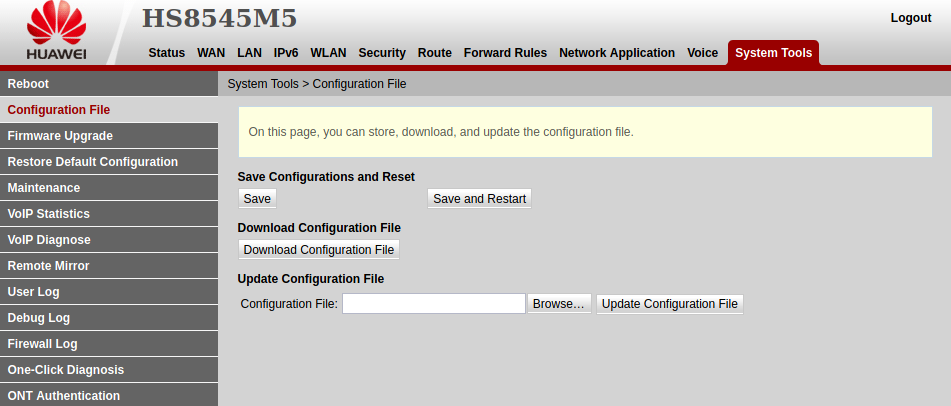
- Open with any text editor and search for Username and Password fields.
Copy the password hash just in case something goes wrong.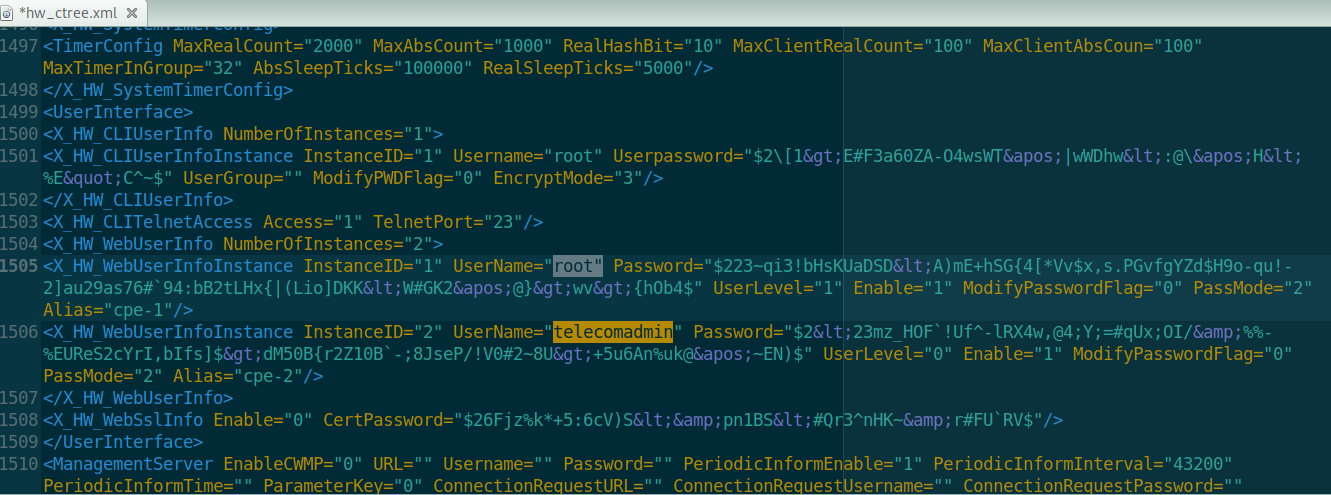
- Huawei devices uses two step hashes. MD5 and SHA256.
If you are a Linux user, use below commands to create hashes 5 new password.
OR
You can also use online has converters from below link.
https://www.freeformatter.com/md5-generator.html
A. First convert your plain text password to MD5 and then convert your MD5 to SHA256 hash.
──╼ $echo -n newpasswd | md5sum
e08df5d370e3a10fb6a005763877b60d –
$# Now Convert e08df5d370e3a10fb6a005763877b60d to SHA256
└──╼ $echo -n e08df5d370e3a10fb6a005763877b60d | sha256sum
9be816fc0bf890f4700b60e8ecf1102deeb66fc9c54475d74570126d1e9586f3 –
With your new SHA256 hash, update your config text file and upload config text file to your ONT.
Reboot the ONT and login with the new password.
Mind you again , its always a good idea to keep the backup of your config file in case something goes wrong.
Cheers
Teza
Wireless Troubleshooting on Linux (applies for Kali linux and Parrot OS) with Realtek chipset
After installing Parrot Security OS, I was not able to connect to wifi anymore. The reason being Parrot OS not supporting my laptop’s Realtek wifi chipset.
Long story short and get to the troubleshooting steps, that got me going.
ifconfig
See if your wifi interface is up, normally you should see a loopback interface, LAN interface and a WLAN interface.
lspci
Check your chipset model. Below is my wifi card. If you see something similar but WLAN interface is not showing up on ifconfig, then its most likely the driver issue.
03:00.0 Network controller: Realtek Semiconductor Co., Ltd. RTL8821CE 802.11ac PCIe Wireless Network Adapter
Temporary internet connection
You will need an Internet connection
I know it sounds silly when your WLAN interface is not showing up, but trust me its alot easier to try to connect to internet first. Get a wifi adapter or an Ethernet cable to connect to the internet first.
Step 5 – Disable Secure Boot in Bios
reboot your computer, in Bios configuration, Enable Legacy and disable Secure Boot.
Save and Exit. Depending on your Laptop make, F key will be different. For HP, it is F10.
Git Clone driver for Linux
sudo git clone https://github.com/tomaspinho/rtl8821ce
change to download folder
cd rtl8821ceChange permissions
chmod +x dkms-install.sh
chmod +x dkms-remove.sh
Run the Installer
sudo bash dkms-install.sh
Reboot your computer
AWS Virtual Private Cloud Setup
This is my Video tutorial on how to manually set up Virtual Private Cloud VPC on Amazon AWS.
This will include setting up, VPCs, Subnets, Internet Gateways, Security Policy etc.
If you like this video and want more contents like this, please like and subscribe.
Why not! Its just one simple click and you will not lose anything!
Hyper V not connected to the internet
Are you having issues with Hyper-V not connected to internet?
There could be a few reasons.
But the most likely issue is with your Virtual Switch.
Here is a tutorial I created on how to set up your virtual switch to get internet connection on your VM.
If you find this video helpful, please like and subscribe.
I have more contents to share.
Configuring Network on Linux VM, updating packages
Quick note on setting up Linux VMs on Hyper V.
Step 1: Check adapters, test internet connectivity
First, check if the network adapters are attached.
ifconfig
you will see Ethernet, loopback or WiFi adapters.
They look like eth0, lo, wi and you should be getting private IP on those adapters.
If you do, proceed on. If you don’t, please watch my video on how to set up Virtual Switch Manager for VMs.